The Potager

The Potager

Saturday, February 24, 2018

Cooking from the Garden in February

Another rainy day. What a great day to cook from the garden! Of course, very little is actually growing in the garden in February, but I have stored things from last year's harvest. So today I am making Spaghetti Squash Lasagna from the Garden!!!

 I am basing my lasagna on Kalyn Denny's recipe, which I love, and which I strongly recommend you try. The link to the recipe on her blog, Kalyn's Kitchen, is here. Her recipe is low-carb, Keto, low-glycemic, and gluten-free.  No guarantees on mine. She has the most amazing low-carb and low-glycemic recipes. I highly recommend checking out her site.

Lasagna is such a lovely treat on a cold rainy day, don't you agree?  I took out a spaghetti squash I had grown last year from my pantry. This isn't a large squash, but we are only two people, so it didn't need to be. 


I cut it in half (if you put the whole squash in the microwave for 5 minutes, it is easier to cut in half), and brushed it with olive oil; and an Italian Herb mix. I have always used the store bought Italian Herb mix for this recipe, but since I was cooking from the garden, I pulled out my preserved garden herbs.
I had dried oregano, dried rosemary, dried sage and frozen basil leaves. I chopped up the basil leaves, chopped some garlic (my home grown garlic has long been eaten) and mixed them with the dried herbs with a mortar and pestle.
I have to say, the basil smelled amazing. These were just leaves - no special treatment. As they thawed they got soggy, but the flavor was so fresh. I will preserve them again like this.
I used about a third of my homemade Italian herb mix on the squash and popped them into a 400 degree oven to cook.

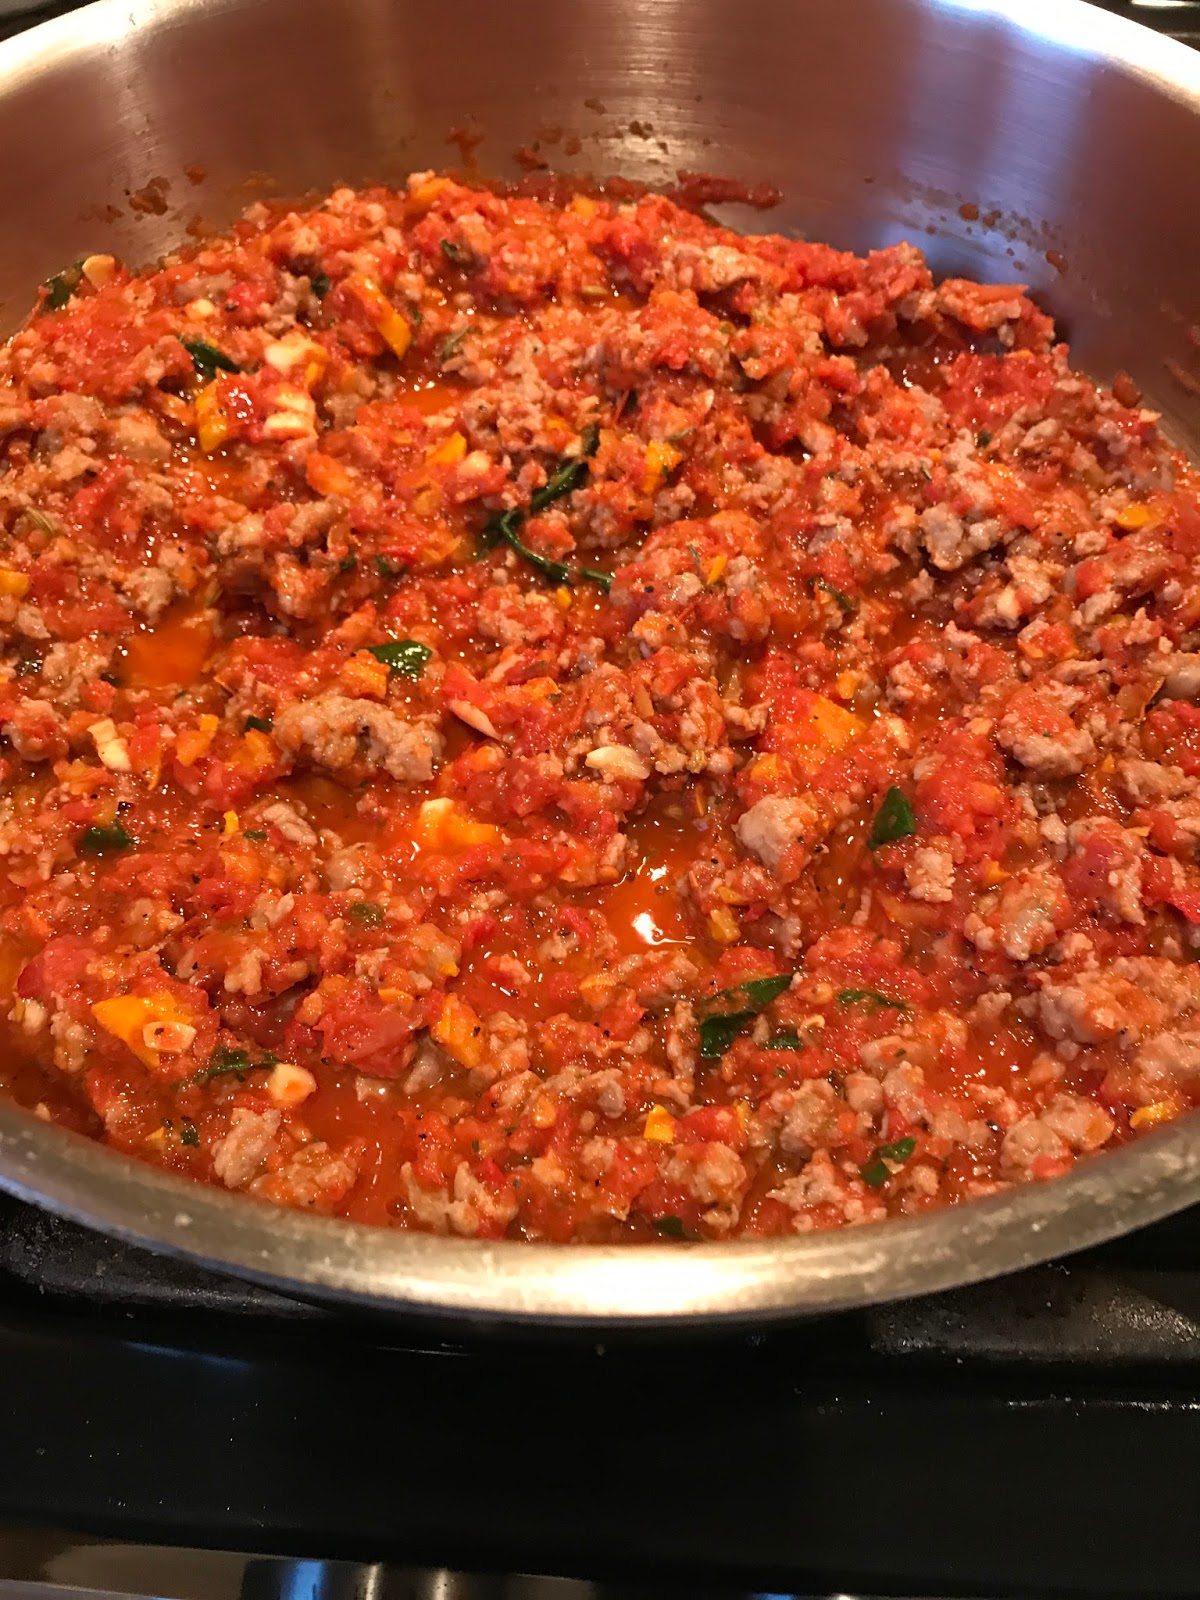
I then browned a package of sausage. Kalyn uses turkey sausage, but I had a bunch of Premio Sausage I stocked up on during a great sale at my grocers, so I used that. I removed them from their casings and browned them while occasionally smashing them to break them up.
When they were nicely browned I added a jar of vegetable sauce I had frozen last summer. Vegetable sauce is made from not only tomatoes, but zucchini and any other vegetables that are being harvested from the garden when you make it. The flavor is a bit different from tomato sauce, but still very yummy!
I freeze a lot in mason jars. I have never had a problem with one breaking. I could have used another cup of sauce, but this is what I had, so it was added to the (drained) sausage, along with 1/3 of the Italian herb mix, an additional garlic clove and more basil leaves.
This cooked until the liquid had evaporated down, about 30 minutes.
While the sauce and squash were cooking, I did my dishes and was looking at my cold frame and thought "Why not add some spinach to the lasagna?" So I went out in the rain and harvested about 2 cups of fresh from the garden spinach.
The cold frame is a new project and I will talk about it once I figure the whole thing out. Mistakes have been made, but I did grow some spinach!

When the sauce was ready, the spaghetti squash was also done cooking.
I took a fork and scraped the flesh to get the "spaghetti". This is so much fun to do!
In a small bowl I mixed the remaining 1/3 Italian Herb mix with about two cups of ricotta cheese and two eggs. I also shredded about 2 cups of mozzarella cheese and about a half cup of pecorino-romano cheese.

I sprayed the inside of a baking dish with olive oil spray, then layered spaghetti squash, sauce, ricotta cheese mix, spinach, mozzarella, pecorino-romano and repeated the layers. (You may think my dish in the top photo is small and you are right. My hubby does not like squash. I make him a duplicate lasagna subbing out the squash for ready to cook noodles. I keep feeding him squash. He actually said he didn't mind the butternut squash I made the other night. I WILL convert him. Someday.)

The lasagna (s) bake at 375 for about 40-45 minutes. It was so good! And we have left-overs for lunch for the next few days! 
Spaghetti squash lasagna. Give it a try!


Friday, February 23, 2018

Spring Teaser

This isn't a Friday Favorite, but it could be. This week we had snow on Saturday night and then a few days later we had two days of weather in the 70's.  A Spring teaser of  70+ degree weather in February is always a favorite!!

This week is 10 weeks before our last frost in our area.

I took advantage of the lovely weather to plant Celery and Summer Savory seeds in seed trays on my potting bench. No mess in the house to clean up!
 I planted Utah Celery from Pinetree Seeds  and Summer Savory from Botanical Interests .

I'm new to Botanical Interests and I am very impressed with their service, their seeds and their packaging.  You can see on the Pinetree Seed package all the information they give you. (I love Pinetree Seeds and mean no disrespect to them - they are a great seed company!) The Botanical Interests seed package has so much more information including detailed instructions on when and how to start seeds, special germination instructions, a description of the variety, what it is used for, a plant tag and that's just on the outside! Inside the pack they have the history of the plant, botanical facts, recipes, how to avoid diseases and pests - it's impressive!  All their seeds are GMO free and untreated. They were offering free shipping during February - bonus! My order arrived quickly and included a free pack of Mesclun seeds!  I'm going to plant them in a flat under my lights and see if I can grow a salad or two indoors!
 I have never grown celery before. From what I've read, they can be difficult. I have memories of riding through Lancaster County years ago and seeing the Amish gardens with white paper wrapped around the celery to blanch it. Utah is supposed to be self blanching, but I have also read the taste is more celery like if the plants don't blanch. It's an experiment. We'll see how it goes.

I planted twelve celery plants and twelve summer savory. They need light to germinate so they went into my grow room under the lights.

Of course I got out in the garden. I have heard it is damaging to the soil to prepare it too early, but I still pulled out weeds, cleaned up my Asparagus bed and added compost and bone meal, moved some dirt and had very dirty hands for two days - I loved it! 

February came back with rainy cool temperatures so I took care of my leek seedlings in the grow room.
These leeks were planted January 22 and were about 6 inches tall and floppy. Leeks and onions have a hard time getting rid of their seeds; those are the black dots on the tops of the leeks in the photo above. I took scissors and gave them a haircut, cutting them all to 3 inches tall and cutting off any seeds in those smaller than 3". This will help them put more growth into the base so they thicken up and get strong. They, and the onions I planted, will get regular haircuts to keep them strong.
As a bonus, the leek clippings can be used as a garnish in eggs, potatoes or other dishes. It's like my first harvest of 2018 😉!

Friday, February 16, 2018

Friday Favorites - Ebates

Welcome to Friday Favorites, the day in which I share something I use and love

⬻⬻⬻⬻⬻⬻⬻⬻⬻⬻⬻⬻⬻⬻⬻⬻⬻⬻⬻⬻⬻⬻⬻⬻⬻⬻⬻⬻⬻⬻⬻⬻⬻⬻⬻⬻⬻⬻⬻⬻⬻⬻⬻⬻⬻⬻
Do you shop on-line? Who doesn't these days?

I love shopping on-line! It takes me about a half-hour to reach a store from where I live, plus time spent walking around to see if you can find the thing you need and a half hour drive home.  Of course before you find what you need you've added five or six things you didn't need to your cart! What a waste of time and money!

The majority of my non-food shopping occurs on-line. And before I start on-line, I start at Ebates! 

Are you familiar with Ebates? Ebates gives you money for shopping on-line. Really! No catch.  Stores give Ebates a commission for sending their members to their websites, and Ebates shares it with their members. 

Here is my latest Ebates "Big Fat Check":

Yes, $53.57 just for doing my on-line shopping through Ebates! Checks are issued once a quarter. This check is bigger than most because I booked my trip to Paris through Travelocity which was offering cash back through Ebates. All prices being equal, why not get some money back?
There is an App for iOS & Android that offers special App only cash back deals as well as an App for
iPhone, Android and iPad which also offer special deals. These Apps will remind you when you start to shop online that there's a Cash Back deal at the store you are shopping at! It couldn't be any easier!  (Amazon almost always has deals!)

You can even earn Cash Back when you shop in-store at selected stores!

Some gardening supplies companies are also on Ebates. You can use this link to see the cash back amounts for Burpees seeds. If you were ordering from them anyway, why not earn cash back? 

I am not being paid to endorse Ebates, or any of my Friday Favorites, but if you are going to shop on-line anyway, make money doing it! It you are interested in joining Ebates, click on this link ebates/DWHITT and you will get a $10.00 bonus (if you spend $25.00) and I will get a bonus too!

Ebates - I highly recommend it! Try it and you'll see!


Thursday, February 15, 2018

Meet Our New Puppy!


Meet Chase. He is an 8 week old Border Collie we picked up this morning from NelsonBorderCollies. He is a joy! We are so in love with him already.

His big sister Teagan is so excited to have a playmate! They already discovered they both enjoy digging. 😟 They also had a game of chase (Teagan runs faster than any dog I've ever seen, so Chase gave up pretty quickly), and several supervised doggy play sessions.
 I'm sure Chase will be  a wonderful addition to our family!
 

Monday, February 12, 2018

How I plan my Garden

January is when I typically plan my garden. This post is a bit late, but there may be some of you who have not yet begun your planning, so let me tell you what I do.
The first thing I do is stockpile the seed catalogs that begin to arrive around Christmas.
Once Christmas has been packed away, I fix a cup of tea and pull out the catalogs and do a first go through. I put post it tags on everything that I want (which is always more than I need!) Then I go into my leftover seeds and eliminate any duplicates and make notes of things that are low or missing.
The next thing I do is pull out my garden notebook from last year and pour a second cup of tea while reading over my notes and making new notes in this year's notebook. For example: In 2017 we tried one Black Krim tomato plant for the first time and loved it. So in my 2018 notebook, I write buy seeds for Black Krim tomato. I buy my notebooks from the Dollar Spot (or whatever they call it these days) at Target. 
Then I start my Garden Notebook with some goals (cough cough, Restart blog didn't get done) and a list of what I ordered, from where, and how much I spent. I'm not sure why I track what I spend, because even if gardening put me at a negative balance, I'd still do it. 😉
 In my notebooks I keep track of what I planted, what it needs in the garden and, if I gathered some information from watching You Tube (💓) or reading (💓💓), I make notes of it in there. Eventually, I will make an index so I can find my onion information, or leek information without having to read the whole book. (This year I've gotten more colorful - lol)
Then comes the fun part - trying to fit it all in my garden. This year I came up with an idea that I really am excited about! I started out with a map of my garden, as always.
It's not totally to scale, but it's close enough.
Then I put tracing paper on top and planned out my early spring plantings.
This is a game changer for me because it helps me to visualize what beds need to be prepared. I can tell you in the past I would have prepared beds all over the garden because I wasn't thinking seasons.
Another piece of tracing paper for April planting. The photo doesn't show it as well, but I can still see to my original garden plan, and the March planting plan.
Here is my May plan - these are all subject to change up to a point. For example, I still don't know what I'm doing in front of the cucumbers ... but I am excited that this actually works and it will help me use my space wisely throughout the gardening season.  

Another thing that I always use, and I will give a shout out to Niki Jabbour, who wrote two of my favorite gardening books, The Year-Round Vegetable Gardener and Groundbreaking Food Gardens, is my  "what to plant when" notes that I wrote in the cover of my well worn copy of The Year-Round Vegetable Gardener.
It's my own personal guide based mostly on Niki's advice and some trial and error.

This is how I plan. I'd love to know how you plan! Send me a note in the comments below.


  For everything there is a season, and a time for every matter under heaven:

a time to be born, and a time to die; a time to plant, and a time to pluck up what is planted; 
- Ecclesiastes 3:1-2 

Friday, February 9, 2018

Friday Favorites - Compost Pail

Welcome to Friday Favorites, the day in which I share something I use and love.

Today's Friday Favorite is my Compost Pail, the OXO Good Grips Easy Clean Compost Bin, available here.

This was a gift from my son and daughter-in-law this past Christmas and there are many reasons I love it.

The first and foremost is that there is nothing to rust or get stained on this pail. It is easy to carry out to the compost pile with the attached handle and the lid snaps on and off easily. The lid has no seal, so there is no gasket to get full of nastiness, yet there is no odor when the lid is shut. OXO says that the " lid closes but doesn’t seal, locking in the smell while allowing in a small amount of oxygen that prevents bacteria and mold from immediately forming. "  Yay, no mold! (If you've kept a compost bin on your counter in warm weather, you'll know this is a big deal!) And it is so easy to clean - it can go into the dishwasher!!! The interior has rounded corners, so no nasty compost is getting stuck inside. Warning: nasty photo coming up.
It holds enough for a day (12 cup capacity) so there is no running out to the compost after every meal.

This absolutely gets my seal of approval. If you need a compost pail for your kitchen, I highly recommend this one.

Thursday, February 8, 2018

A Greenhouse Full of Orchids!

I'm not a big lover of houseplants. I have a few scattered around the house because they are supposed to be good for one's indoor air quality, but they don't excite me like a garden does. They look the same day after day - no new vegetables, no sudden growth. Sigh. In fact (true confession time) I have been known to "accidentally" leave them outside at the end of summer. 😳

My friend Sheila grows orchids. Beautiful orchids that bloom each year for months on end. I admire her. Because while I think orchids in bloom are beautiful, they spend a lot of time looking like this:
This is my sole grocery store variety orchid. Or as I call it, "the orchid I haven't given to Sheila in frustration yet." But today I became inspired to care for it a little bit longer. Sheila asked me if I wanted to join her and her friend Sandy on a trip to Dearborn Market in Holmdel for their annual Orchid Show . The show runs through Sunday February 11th if you're in the area.  You can click on the link for more information.

Spending a few hours in a green house in February was enough enticement,  but I really wanted to meet Sandy Greig of Bringing the Farm Home. She is so talented and has such a beautiful blog.  Check it out when you have time! Sandy was as down-to-earth and friendly as she seems in her blog.

So off we went to spend time with the orchids. In the dullness of February, the colors and fragrances were almost startling. And the warm greenhouse was the perfect place to spend the afternoon. We bought lunch at the market and found a cozy little table for three and just had a wonderful time!  It was a perfect winter break! I came home and looked at my poor little orchid with new respect. As long as I hide it next to the primroses so it doesn't just look like leaves, it may stand a chance! If not, there's always Sheila.
But enough of my sad looking orchid, here are some beauties from the show. I know nothing about orchids and wouldn't even try to name them, so I'll just let their beauty speak for itself.


28 “And why do you worry about clothes? See how the flowers of the field grow. They do not labor or spin. 29 Yet I tell you that not even Solomon in all his splendor was dressed like one of these."
 - Matthew 6:28-29


Monday, February 5, 2018

Could it be... almost two years since I posted? 

Yeah, it could. But in the two years since, things have changed. For one, I retired.  Starting this blog back has been one of my retirement goals. 

Our empty-nest family has grown to include a rescue pup, named Teagan,
who is 20 months old and soon to include a puppy ( yes we've lost our minds) in addition to the two cats. (Doesn't Teagan have the cutest face ever?)

Last summer was my first retired summer and we are still eating things I froze and canned from the garden. I had some successes and some big failures last year, but I learned a lot and I am looking forward to sharing my experiences in and out of the garden with you this year.

So let's get started!

Today is about 12 weeks before the last frost in my part of New Jersey.  This is a good time to start onions and leeks from seed. I planted my leeks two weeks ago and they are up and under the grow lights.

This morning I planted onions. I planted 72 cells of Ailsa Craig Exhibition Onions, seeds from Pinetree Seeds. Ailsa Craig onions are sweet onions that can grow really large. (We'll see how that goes.) I was happy that there wasn't a ton of seeds in the seed packet. Onion seeds don't keep (you have to buy fresh every year) and I don't need  500 onions. 
I filled my trays, which I bought on Amazon here and the under trays here, with Espoma seed starting mix. I have much better results with Espoma that the one sold at the big box stores and Wal-Mart.There was enough for each cell to have two, and some have three and some have four because.... just because. 
I then covered the seeds with dry soil. The dry soil is a different color than the wet soil and it's easier to see if you've covered all the cells.

Once covered the soil got a good soaking. I use a spray bottle of room temperature water for this.


Then the tray was covered in plastic to prevent moisture loss, and since seeds need warmth, not light, the whole tray was popped into my kitchen cabinet that sits above the kick space heater.

I will watch the seeds daily and when they first start coming up they will be moved to light.